Thursday, October 27, 2011
Wednesday, October 26, 2011
Hi, here is a picture frame that I have made. I bought the wooden frame from Michaels dollar bin. I painted the back and then mod podged the paper on the front of the frame. I then inked around the edges with vintage photo ink. The flowers I colored with tatered angel ink, and I edged them with stickles just to add a little bling. I put some lace and pearls on and put a copper butterfly charm on the frame as well as a stick pin that I made. I wanted to give as a gift so I made the box to go with it. The box size is 8X8, so I used a 12 in piece of paper and used my crafters companion box maker to make the depth 2 inches to allow for the flowers. The top of the box I made a rosette with lace and put another flower in the center. I just love how it turned out and will be making another one. Thanks for looking Debbie
Tuesday, October 25, 2011
Hello, I thought that I would share with you my first ever mini album. This was made following a y tube tutorial from Kathyorta from Paper Phenomenon. This album was made from cards and envelopes. She has great totorials they are very informative and easy to follow. If you get a chance you should check them out. There are more pages then I am showing, I just showed a few so you could get the idea how the pages look. I will definately be making more albums in the future. Thanks for looking Debbie
Sunday, October 23, 2011
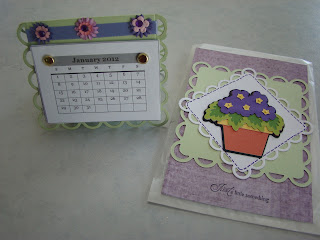
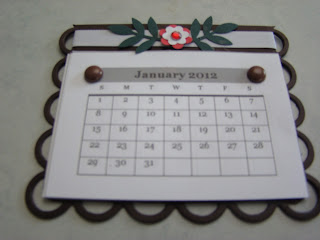
Hello, my husband asked me to make something to give the girls in his offfice for a Christmas present. Every year I try to make him something a little different. I was looking at the cards on Stamp TV and saw this little desk calandar, so I thought this would make a wonderful gift for the girls in his office. Thanks Carolina for the idea.... she also had the PDF file for the calandar for a download. These were made using spellbinder dies, I then embelished them with small flowers and then decorated up the envelope that I put them in. Thanks for looking Debbie
Saturday, October 22, 2011
Hello, I needed some new christmas decorations, so I made these stockings. I used the Gingerbread cartridge and cut the stocking at 5 inches. I cut the stocking 3 times with white cardstock then twice with the christmas paper,so it would be finished on the back also. I glued them all together, then mod podged them. I punched a hole in the top for the hanging ribbon, then embelished them. Have a great day, and thanks for looking Debbie
Friday, October 21, 2011
Thursday, October 20, 2011
Good Morning, I wanted to share with you some Christmas tags that I have made. The tag was cut from Tags Bag Boxes and more cart at 4 1/4 inches. First I cut it in white on shadow then I cut the paper out on blackout. The house I cut from glitter paper at 3 inches from the Christmas Cheer cart. I just cut some yellow paper to put behind the windows. The Gingerbread doll is from Peachy Keen's Cottage Cutz, and I inked around with vintage photo, and the bow I made from twine the Twinery The stamp is from Stampin Up. I think they turned out cute!!! Thanks for looking, Debbie
Monday, October 17, 2011
Good morning, I wanted to share with you a halloween hanging that I made. I got this idea from Mary at Cartz TV. Last year she made one and I thought it was so neat that I had to try and make one this year. I cut my ghost and frankenstein and dracula out of chipboard from the Happy Hauntings cart, at 5 inches. I then cut the layers to put on the chipboard. I used a papertowel roll flattened and put the paper on it. I cut out the word BOO out of glitter paper and glued it on to the paper towel roll. I used my cropadile to put eyelets about 2 inches in on the top and one on the middle on the bottom to hang the Ghost. I pulled orange tulle through the top eyelets and tied a bow. The spiders are Jolenes. Thanks Mary for the Idea, I think it turned out cute.... thanks for looking Debbie
Subscribe to:
Comments (Atom)


